Take the mark off a photo that's yours to begin with
Remove a watermark from a photo you own: brush over the mark, let AI rebuild the background behind it, then zoom in to check. Plus what US law says.
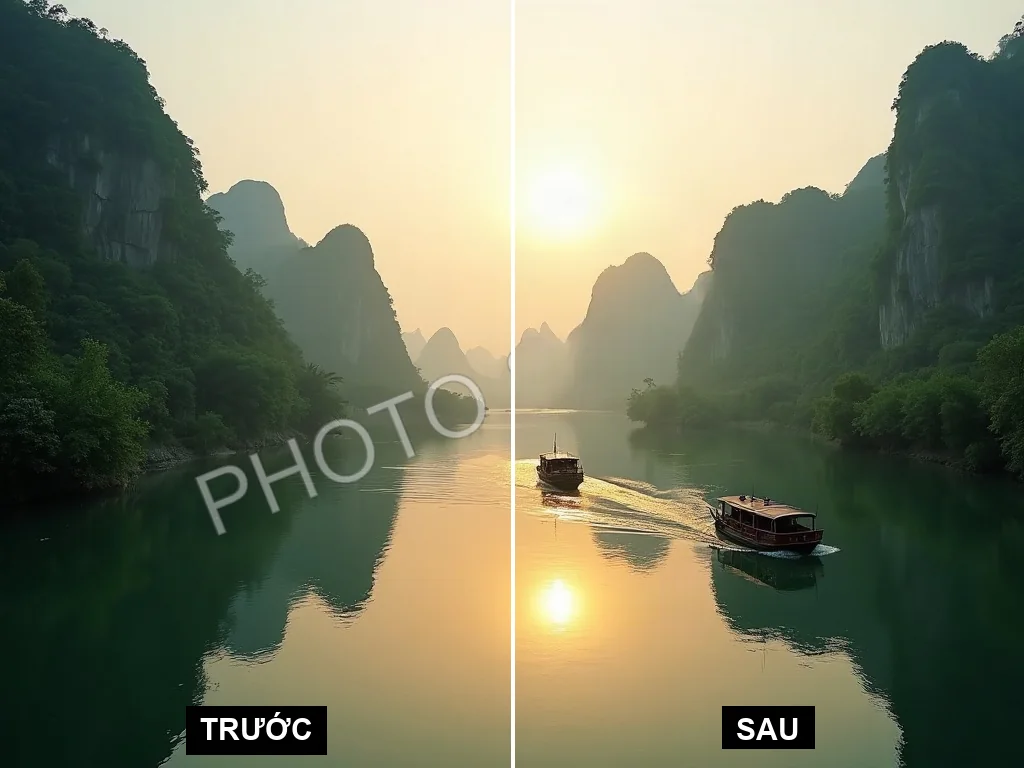
You have a photo of your own with one mark on it. You do not want to install Photoshop or learn a clone-stamp tool to fix a logo in a corner. You want it gone and you want the file.
That is what the watermark remover on Vipix does, in a browser. But first, the part people search for before touching anything.
First: whose photo is it?
Cases where it's your call
The straightforward ones: a photo you shot, exported by an app that stamped its own logo in the corner; a photo you paid for and hold the rights to, delivered with a proof mark on it; a supplier's product photo you have permission to use, logo baked in.
If you cannot say which of those you are in, ask whoever delivered the file before you strip anything.
What US law says about removing credit information
This article is general information, not legal advice.
The federal provision here is not the one most people expect. Under 17 U.S.C. § 1202(b), intentionally removing or altering copyright management information — without the copyright owner's authority or the law's — is unlawful when you know, or have reasonable grounds to know, that doing so "will induce, enable, facilitate, or conceal an infringement."
§ 1202(c) defines that information broadly — titles, the author's identity, the owner's identity, terms and conditions of use, identifying numbers — while excluding personally identifying information about a user. So a watermark can be treated as copyright management information, because it often carries exactly that. Not every mark is, and it is not a label you can apply by eye. And the knowledge element does real work: the section is written around erasing while knowing it will conceal an infringement, not around erasing alone.
§ 1203(c)(3)(B) lets a plaintiff elect, instead of proving actual damages, statutory damages of not less than $2,500 and not more than $25,000 per violation, at the court's discretion — a range in a civil case, not an automatic fine.
How that lands on your file is a question for a lawyer. For the longer version: watermarks and photo copyright, case by case.
The mark you can see is not the only credit in the file
Worth knowing before you assume a clean corner means a clean file. Credit and rights information also travels inside the image as embedded metadata, and erasing pixels does not touch it. That cuts both ways: a photo you own keeps its own credit fields when you remove a stamp, and a photo somebody else made keeps theirs.
One platform rule shows how seriously that metadata is now taken. Google's product data specification tells merchants not to "include promotional text, watermarks, or borders" on a product image — and, separately, "Don't remove embedded metadata tags such as the IPTC DigitalSourceType property from images created using generative AI tools." Cleaning a mark off a photo is ordinary work; stripping the tag that says how an image was made is a different act, and at least one large distribution channel now treats it as one.
Why sellers strip marks off their own photos
The most common legitimate reason in the US has nothing to do with hiding anything: marketplaces ban marks on the main image. Walmart Marketplace is blunt about it — the primary image must not carry watermarks, your name or your logo, nor promotional language about the item, competitor names or non-English text, and it wants a seamless white background. A seller handed a supplier photo with a logo baked into it has to produce a clean version before that listing will publish.
Rules differ by marketplace and get revised, so check the current policy where you list. If a full white-background product set is what you need, getting product photos onto a clean white background is the other half of that job.
Remove a watermark in six steps
1 — Upload the sharpest copy you have. Do not use a file round-tripped through a messaging app: every re-compress strips the detail the AI needs to rebuild the area underneath.
2 — Point at the mark, or let the tool find it. Once you are signed in, the editor opens on the detection step, and that is the short road: ask it to scan, and the AI reads the whole photo and draws an outline around the mark for you — a faint stamp, a corner logo, a line of text laid across the picture are all inside its range. It waits for you to ask; it does not fire the moment a photo lands. The scan itself, and every adjustment you make to the outline afterwards, cost nothing — no credit is deducted for either, only for the removal at the end. Your part is short, and it is the part that decides the result: look hard at what it outlined, then extend the outline over anything it missed. There are four ways to point at an area, in the order they sit on screen:
- Letting the tool scan for the mark is the default here, and the main road. One pass and the outline is drawn for you. If the mark carries readable text, the tool picks that text up in the same pass and puts it in a field under the picture; take out the words you want to keep on the photo, apply that, and the outline shrinks to exactly what is left — no redrawing from scratch.
- Brushing over the mark is what you reach for when the scan outlined too little, or when you want to decide every stroke yourself: a long text mark, a thin logo, a diagonal stamp. It shows you exactly which pixels are about to be touched.
- Tapping the mark is quick when it sits in one place on a clean background.
- Describing the mark in words is for when you can name what you want gone. A faint corner mark is hard to name, so this one lands least often for this job.
One thing here runs against intuition, so it is worth saying plainly: painting by hand is not automatically the safer choice. Paint far wider than the mark and the AI has to rebuild picture that never carried a mark at all — that is where smears come from. The editor says as much itself: cover a large share of the frame with your own strokes and it warns you, and points you back at the scan for a tighter outline. The order that holds up is scan first, look hard at what it outlined, then fix by hand only what it missed.
3 — Cover the mark, and a little past its edge. Inside the brush mode sit a brush, an eraser and a brush-size slider. Spill slightly beyond the outline: leaving a hairline of the original edge is the most common miss, and the leftover sliver reads louder than the mark did. Painted too wide, trim with the eraser.
4 — Run it. There is a quality choice before the button — a standard pass and a higher-effort pass. Unsure, take the standard one. The credit cost shows on the button before you press it. The AI then lifts the mark and rebuilds what it covered from the texture, color and light around it.
5 — Zoom in before you're happy. Use the before/after slider, then zoom to actual size — smudges only appear at 100%. Check for a ridge along the edge, a flat smeared patch where texture should be, and any straight line running through it that no longer lines up. Not right? Brush wider, or split a mark spanning two backgrounds into two passes.
6 — Download. The result is also saved to My images in your account, so within the retention period (see our Privacy Policy) you can download it again without paying for a second run.
On a phone
No app needed — open the tool in a mobile browser and run the same six steps. What changes:
- The same step opens first on a phone as on a desktop: signed in, you land on the scan either way, so there is nothing to switch before you start. Scan, look at the outline, and only then brush in what it missed.
- Short strokes, smaller brush. A fingertip covers more than a cursor and one long drag wanders. Overlapping is fine — painting twice still just means "clear this."
- Pinch to zoom before you edge a small mark, and turn the phone sideways for a landscape photo.
- Check harder at step 5. A small screen flatters everything.
- iPhone photos are usually HEIC, and the editor takes JPG, PNG and WEBP. Switch your camera format to the most compatible option, or share the photo out as a JPEG first.
When it comes out clean, and when it leaves a smudge
Worth knowing before you spend a run on it.
Usually invisible: a small mark or logo in a corner over sky, water or a plain wall; a mark on a flat single-color product background; a semi-transparent mark over a low-detail area.
Expect to inspect, sometimes to redo:
- a large mark mid-frame, where a lot of background has to be invented;
- a mark over a face, a hand, other text, or over dense pattern — lace, tile, foliage;
- a mark tiled across the whole image: the hardest case, because nearly the entire photo has to be rebuilt;
- a photo already compressed repeatedly, so detail around the mark was mush before you started.
For the second group, stop trying to do it in one pass. Clear one cluster at a time, each over a single consistent background.
Watermark, text, or object: picking the right tool
Picking wrong costs a run. A logo, a graphic or a semi-transparent stamp is watermark work — this tool. Scattered text is text-removal work. A person or thing physically in the frame is object work: clearing people and clutter out of a shot.
Frequently asked questions
Is it legal to remove a watermark?
This article is general information, not legal advice. The provisions to know — 17 U.S.C. § 1202(b), the § 1202(c) definition, the § 1203(c)(3)(B) damages range — are summarized above. The knowledge element matters, and whether any of it applies to your file is a question for a lawyer.
An editing app left its logo on my export. Can I remove that?
If the photo is yours, that is the easy end of the range: small mark, corner, simple background. Brush over it with a margin and run it.
Why is there still a faint smudge where the mark was?
The area underneath is reconstructed, not recovered — the more texture the mark covered, the harder that is. Brush wider, and split a mark that crossed two backgrounds into two passes.
Can it handle a watermark tiled across the whole image?
The hardest case, because almost the entire photo has to be rebuilt. Expect visible traces, work in sections, inspect at full size.
Does it work on video?
No — still images only. You can pull a frame out of a video and clean that image, but the video file itself is out of scope.
Start with the photo that's been sitting unused
Open the watermark remover and try it on the one you have been putting off. Simple background and a small mark means a clean result; a busy one means budget a second pass. You will need an account, and the credit cost shows on the button before you press it.
How this article was made
1) Written — seo-content produced the en-US version of /blog/cach-xoa-watermark-khoi-anh-online under brief I18N-11, on 08/29/2026.
2) Reviewed — seo-review re-ran the §G publication gate on 2026-09-06 (VIPIX session s148) on an earlier revision and returned PASS-WITH-FIXES, and the next revision fixed the issues that verdict names. Verdict on file: reviews/en-US-regate-s148-verdict.md (earlier gates, 2026-08-29: en-US-T1-regate-verdict.md, en-US-T2T4-gate-verdict.md, en-US-T3-gate-verdict.md). Since then, the article has been edited further. On 2026-09-28, its wording about saved results was corrected to use the page name My images, a change that went through a separate §G gate the same day; this note was also corrected that day.
3) Process — content drafted by the Vipix SEO team's LLM under a reviewed brief; edited and checked by the Vipix SEO team; no native-speaker contractor was engaged.
Every tool does one job — pick yours
18 tools, each tuned for a single task, so you are not hunting through menus for the one setting that does what you meant.
Browse all tools